Introduction: Win the Neighborhood Decor War
Instead of plastic pumpkins and miles of lights, residential projection mapping lets you decorate with light. You can turn your exterior into a haunted mansion, a gingerbread cottage, or a snowfall scene—then swap themes instantly. This guide shows how to set up SurfaBeam with a standard projector for a show-stopping Halloween or Christmas display.
1. The “Inside-Out” vs. “Outside-In” Strategy
Before you buy gear, decide how you’ll project. There are two main approaches—and each has a different “wow” factor.
Method A: Window Projection (Rear Projection)
- Best for: apartments or homes with street-facing windows.
- How it works: place a semi-transparent screen (or a frosted shower curtain) over your window inside the house, then project onto it from inside.
- The effect: from the street, it looks like ghosts are floating inside—or Santa is checking his list behind the glass.
- SurfaBeam advantage: use Corner Pinning to fit the video perfectly to the window frame, so no light bleeds onto the wall.
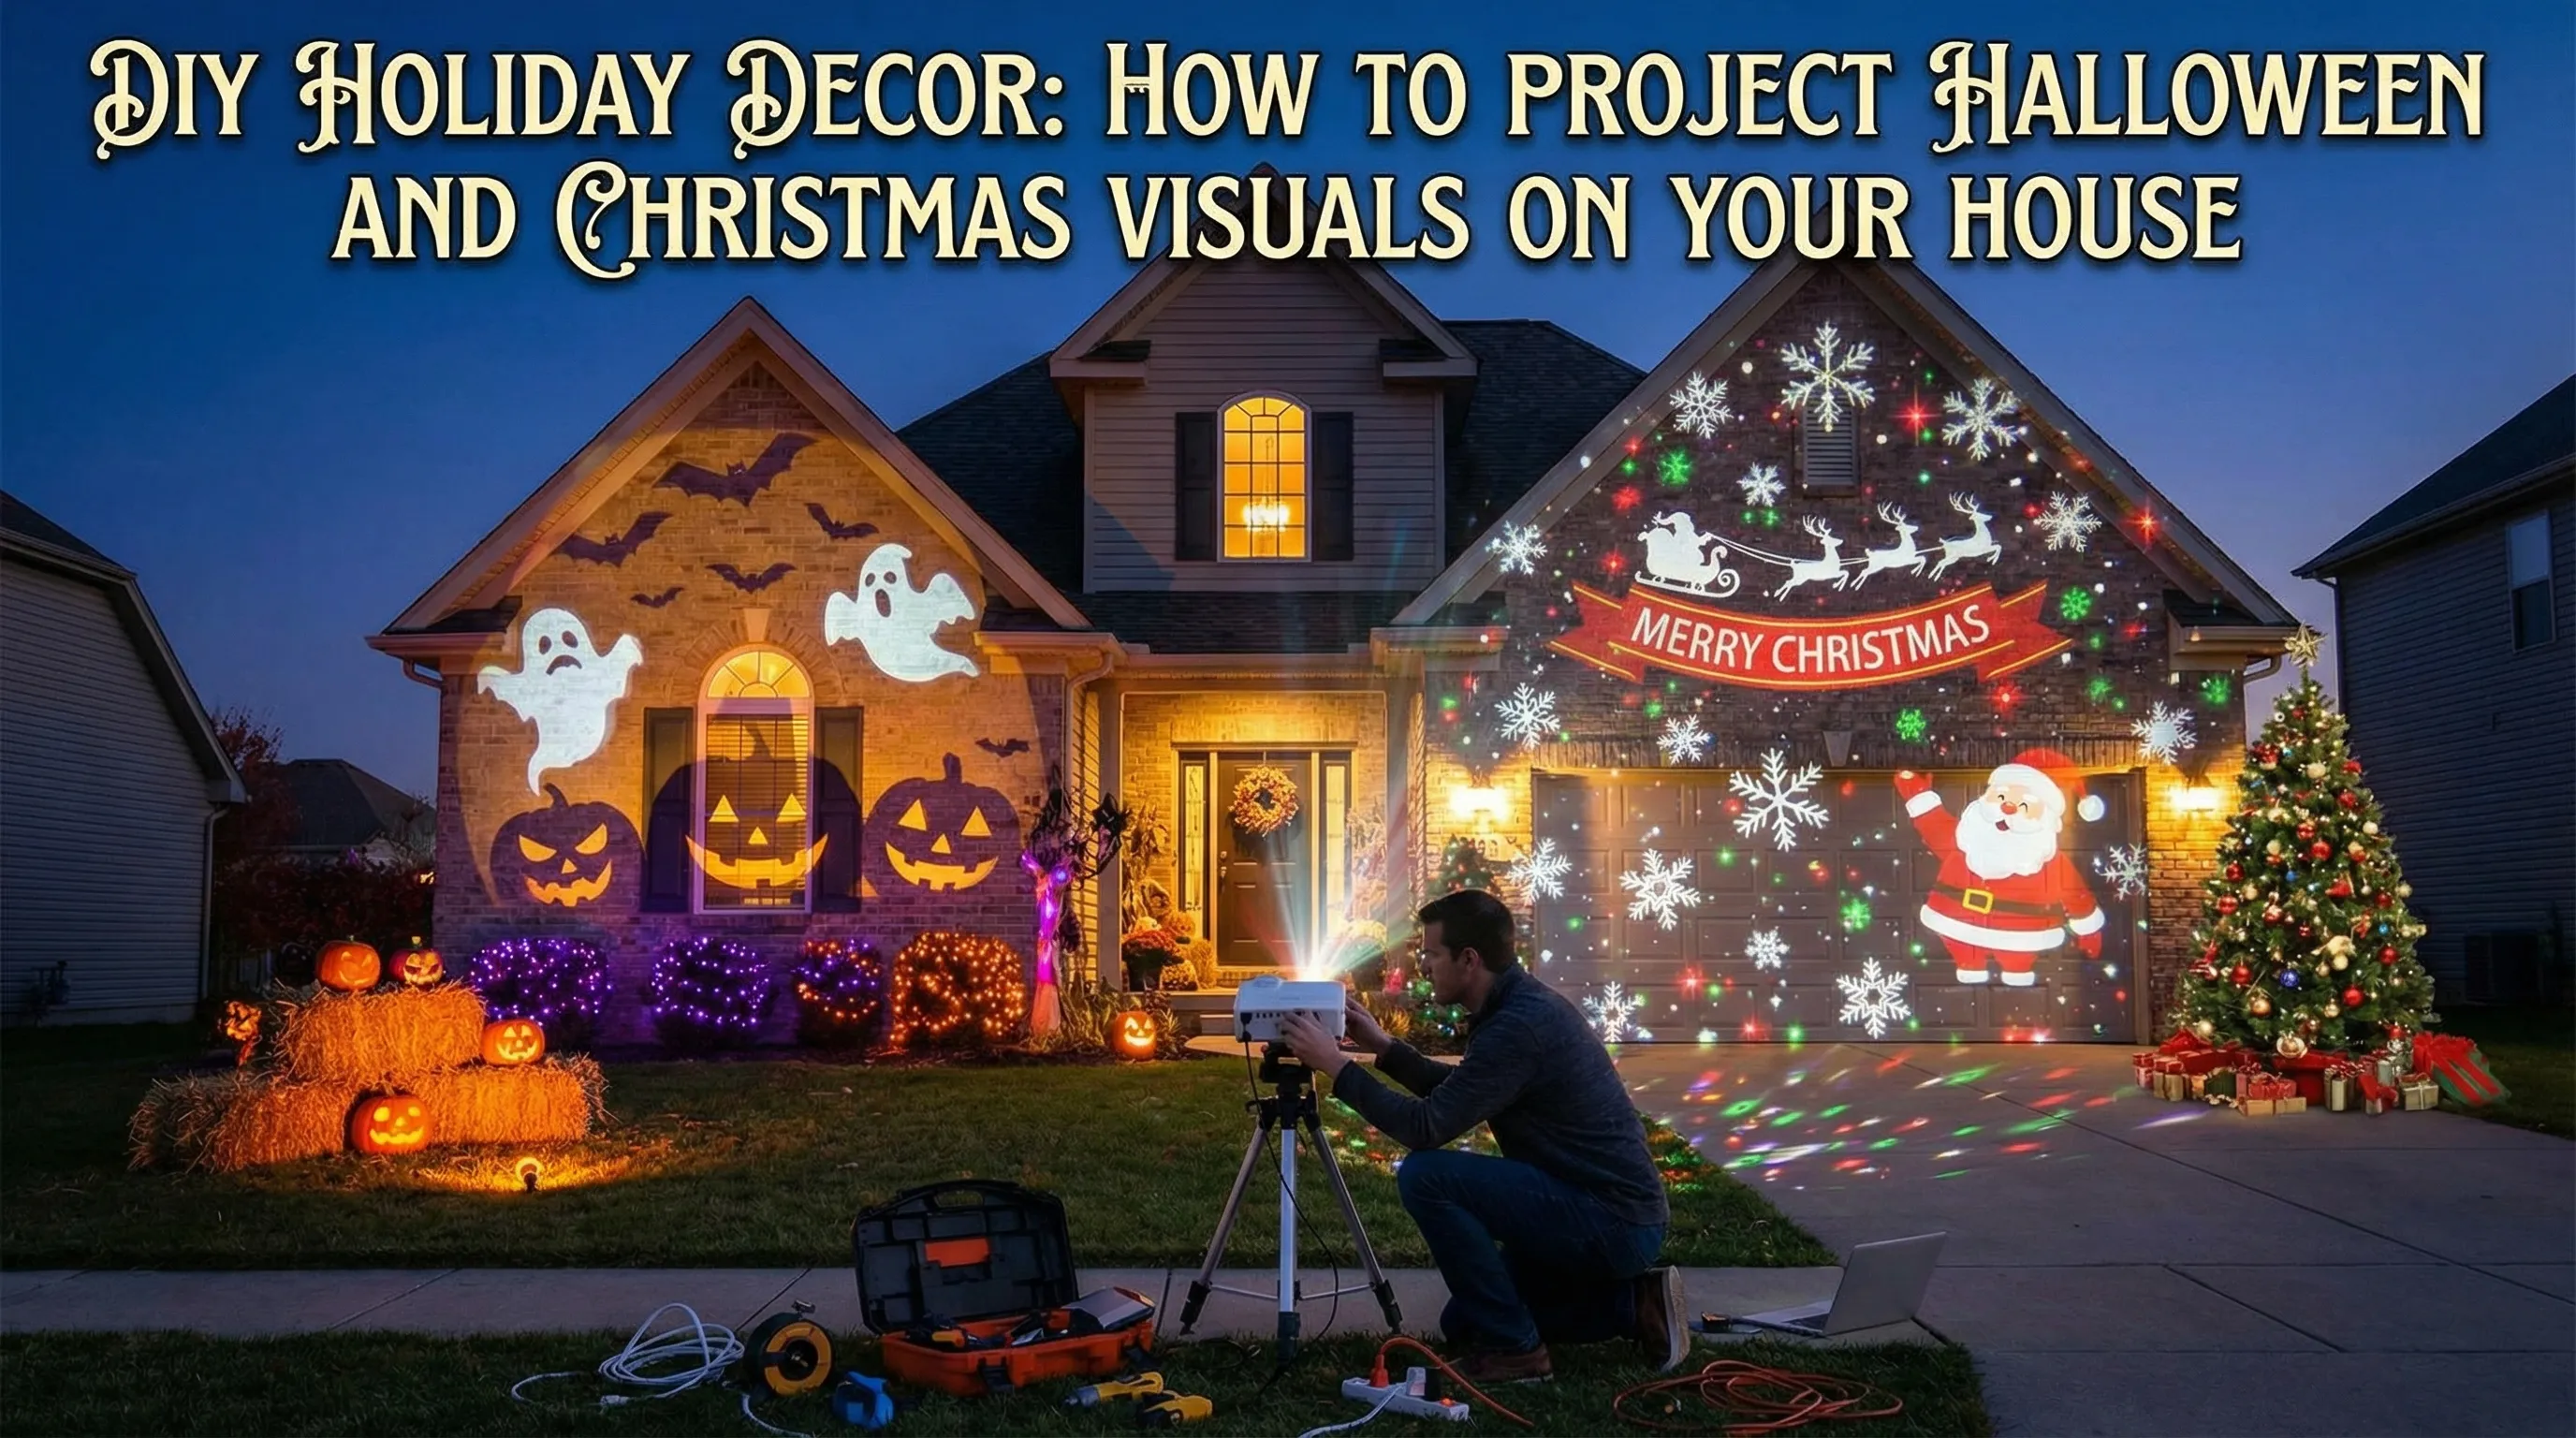
Method B: Whole House Mapping (Front Projection)
- Best for: detached homes with interesting architecture (pillars, garage doors, trims).
- How it works: place the projector outside (weatherproofed) and “paint” the exterior.
- The effect: transform your house into a haunted mansion, cover it in falling snow, or animate the facade.
2. The Gear: Brightness is King
Outdoor projection fights streetlights and moonlight. Your setup doesn’t need to be expensive—but it must be bright and stable.
- The projector: for outdoor house mapping, aim for at least 3,000 ANSI lumens. If you’re using a dim portable projector, wait for total darkness.
- The media source: your smartphone + SurfaBeam Pro.
- Audio (optional but powerful): a small Bluetooth speaker hidden in bushes adds sound effects (creaking doors, sleigh bells) that sell the illusion.
3. Step-by-Step: Mapping Your House with SurfaBeam
Step 1: The “Safe Zone” Setup
Place your projector on a sturdy table or stand in your yard and frame your target surface (window, garage door, facade). Reduce ambient light if possible.
Safety tip: if projecting from outside, use a projector enclosure (even a plastic bin with a clean cut-out) to protect from moisture and dew.
Step 2: Masking the “Dead Zones”
This is the most important step. You don’t want bright light hitting your neighbors’ windows or spilling onto the street.
- Open SurfaBeam.
- Use the Masking Tool (or build a shape using Corner Pins).
- Draw black shapes over areas you don’t want light to hit.
- This “cuts out” light so visuals stay on your siding/bricks only.
Step 3: Architectural Alignment
Use Grid Warping to lock visuals to real features. Pull mesh points until the digital element sticks perfectly.
- Example: make a skeleton climb a specific pillar.
- Example: place a wreath perfectly centered on your garage door.
Ready to try it?
Download SurfaBeam Pro and test a holiday illusion tonight.
Start simple: map one window, mask your edges, and run a looping clip. Once it’s locked, scale up to your full facade.
4. Content Ideas That Stop Traffic
- The “Singing Pumpkins” (Halloween): place real pumpkins on your porch and map “singing faces” onto them. Use SurfaBeam’s mesh to wrap the face around the pumpkin curve.
- The “Snow Globe” Window (Christmas): map a large window and project a loop of falling snow accumulating at the bottom.
- The Crumbling Facade: project cracks and crumbling walls to reveal a dungeon or spooky interior illusion.
5. Pro Tip: The “Black Background” Rule
When downloading or buying loops, always prefer clips with black backgrounds. Projectors can’t project “black” (black is the absence of light). That means black areas disappear—so ghosts, faces, or snow can look like floating holograms without a visible rectangle.
Conclusion: Be the Neighborhood Highlight
Gone are the days of spending your weekend on a ladder. With SurfaBeam, you can switch from “Spooky Haunted House” to “Winter Wonderland” with a tap. Grab your phone, find a white sheet or blank wall, and test your first holiday projection tonight—then scale up to your full house when you’re ready.
Want to build a clean holiday projection workflow?
SurfaBeam Pro helps you mask dead zones, warp to real geometry, and run loops smoothly from your phone. Start with one window—then expand to your full facade when you’ve nailed your alignment.