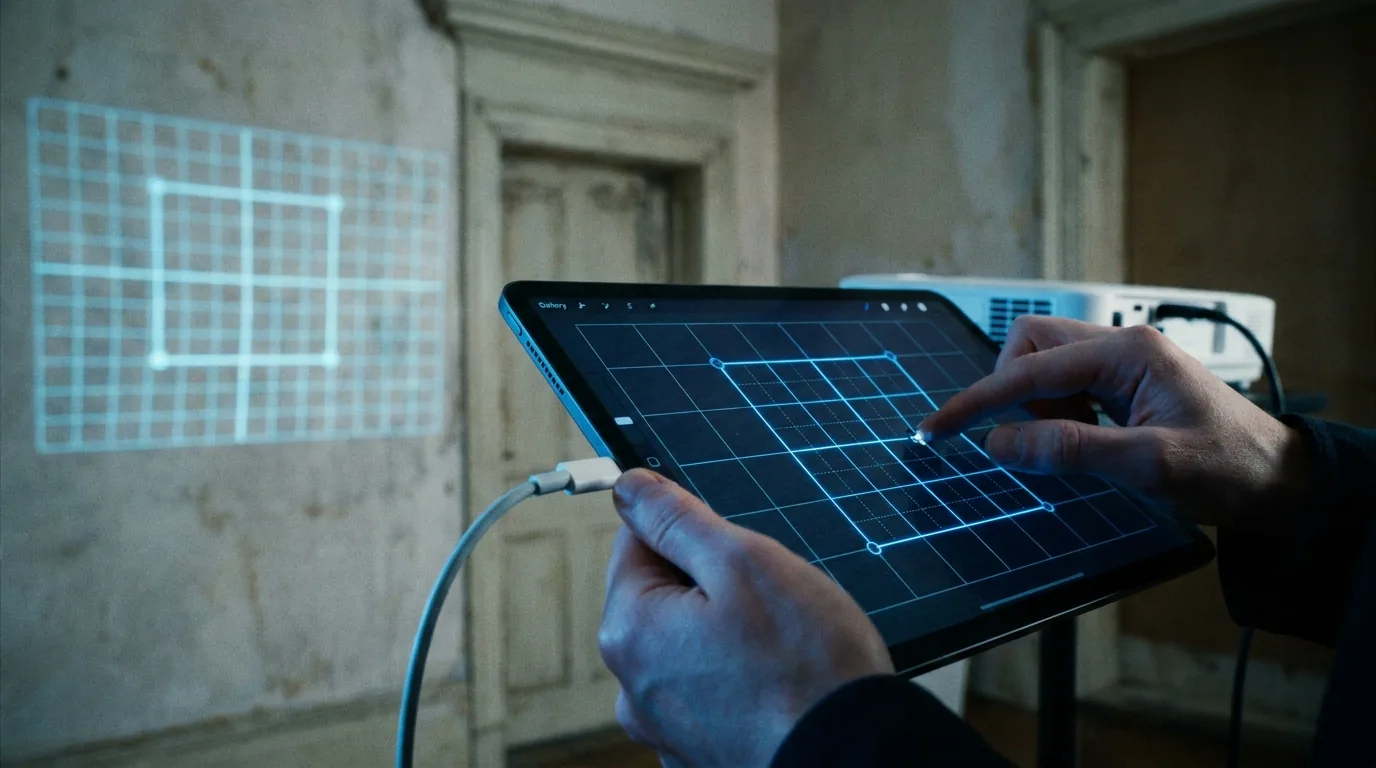
What iOS Projection Mapping Actually Involves
Start with the mental model: your device is the console, the projector is the stage. SurfaBeam claims the projector as a separate output screen rather than mirroring your display. Controls stay on the iPhone or iPad; the wall gets a clean render at the projector's own resolution. The status line reads something like Connected — Extended · Direct Cable · 1920×1080, and the display count flips from 1 to 2.
That answers the question most iPad owners ask first: no, a 4:3 iPad screen does not letterbox the projection. The device's aspect ratio never reaches the wall, and output resolution matches the projector automatically.
Everything else is one loop: add a surface, drag its four corners onto the real object, apply media, project. Warp, masks, tracking, visualizers and the Timeline all hang off it. The SurfaBeam user guide covers every control in order.
The Hardware You Need for Projection Mapping on iPhone and iPad
The iPhone or iPad itself
Almost any current iPhone or iPad will map. Decoding an MP4 and drawing it through a warped mesh is a light GPU job on Apple silicon. Hardware differences show up in live tracking: hand, body and object modes run a vision model, and Body Segmentation downloads its model once on first use — allow a minute for that before an audience is watching. Heat is the more realistic constraint: an hour of video decode with the screen on and HDMI out will warm any phone, and a thick case makes it worse.
The projector
Any projector with an HDMI input works. Indoors in a dimmed room, 3,000 lumens is comfortable; for bright rooms or outdoors, 4,000–6,000 is a safer target. Check what unit the number is in before you trust it — ANSI lumens are measured to a standard, while "LED lumens" and unqualified "lumens" on cheap listings are not, and can read several times higher than the same projector's ANSI figure. Short-throw models earn their price in tight rooms, where throw ratio decides whether you can fill the object at all from where you are allowed to stand the projector. Pico projectors are genuinely fine for small props, cakes, guitars and single windows.
A mount you can trust
The least glamorous item, and the one that ruins the most shows. Once your corners are placed, the map is valid only for that exact projector position — a few millimetres of drift at the lens is centimetres at the wall. Clamp it or weight it.
The Adapter Question: Lightning or USB-C
This is where iOS users actually get stuck, and the internet is full of confidently wrong answers. Get it right and the rest of the setup is ten minutes.
Which iPhones use which port
- USB-C: iPhone 15 (September 2023) and every iPhone released since.
- Lightning: iPhone 5 through the iPhone 14 family, plus every iPhone SE — the SE stayed on Lightning until it was discontinued, so a recently bought SE is still a Lightning device.
Rather than remembering model years, look at the port. Lightning is a narrow, flat oval with eight visible contacts on the outside. USB-C is wider, deeper and symmetrical, with the contacts hidden inside.
Which iPads use which port
- USB-C: iPad Pro from the 2018 11-inch and third-generation 12.9-inch onwards; iPad Air from the 4th generation (2020); iPad mini from the 6th generation (2021); the base iPad from the 10th generation (2022).
- Lightning: the 9th-generation iPad (2021) was the last Lightning model, and it is still everywhere as a school or hand-me-down device.
M-series iPad Pro and Air models use Thunderbolt-capable USB-C. For a projector that changes nothing, but any HDMI cable or dock you already use with a monitor will work here.
If you are on Lightning
Buy Apple's Lightning Digital AV Adapter, or at minimum something MFi-certified. It is worth knowing why: the adapter is not a passive wire. It contains its own processor — the iPhone encodes a compressed video stream, sends it down the Lightning cable, and the adapter decodes it back to HDMI. So output tops out at 1080p, and very fine detail can look marginally softer than the source file.
That ceiling matters less than it sounds: most projectors below the professional tier are natively 1080p anyway, and a mapped surface rarely fills the frame. Uncertified adapters are the real risk — they often work the day you buy them, then fail with an unsupported-accessory message after an iOS update. Use the spare Lightning port for power too; a phone driving HDMI at full brightness will not last a two-hour event.
If you are on USB-C
A plain USB-C to HDMI cable works, provided it supports DisplayPort Alt Mode — that is the part carrying video, and a charge-only cable gives you nothing. Apple's USB-C Digital AV Multiport Adapter is the safer buy for event work: it adds USB-C power passthrough and a USB-A port, and supports up to 4K at 60Hz.
One point of confusion worth clearing up: the USB-C port on the standard iPhone 15 and 16 runs at USB 2.0 speed for data. That does not limit video. DisplayPort Alt Mode uses separate lanes, so a non-Pro iPhone still drives 4K HDR from the same port that copies files slowly.
The USB-A port is more useful than it looks. From iOS 17 you can attach an external USB camera, and SurfaBeam lists it in the camera dropdown beside the built-in ones. That lets a tracking camera watch the room from a fixed position while the phone sits on a table.
Five adapter mistakes that cost people a show
- A charge-only USB-C cable. No DisplayPort Alt Mode, no picture, and nothing on screen tells you why.
- An uncertified Lightning adapter. Cheap now, dead after the next iOS update.
- Plugging in after launching the app. On iOS, macOS and Windows, connect the projector first, then open SurfaBeam. Android is the platform that hot-plugs happily; iOS is not.
- No power path. Feed a 20W or larger charger into the adapter's power port and stop thinking about battery.
- A long passive HDMI run. Past roughly 10 metres, passive HDMI gets unreliable. Use an active or optical cable for stage-depth runs.
Adapter sorted?
Get the app and map your first surface.
One App Store listing covers iPhone, iPad and Mac. Full mapping, media, effects, tracking, visualizers and the Timeline are in the free version.
AirPlay or a Cable? The Latency Trade-Off
AirPlay needs a receiver — an Apple TV, or a projector with AirPlay 2 built in. Cheap generic casting dongles tend to compress hard and soften edges, which is precisely the detail projection mapping depends on.
Wireless links in SurfaBeam are forced into extended mode rather than mirroring, so the app decides exactly what appears on the wall — no home screen projected between cues. The cost is latency: on a well-tuned dedicated 5GHz network, expect somewhere around 100–300ms.
That delay is invisible on static content and slow ambient loops. It is very visible on anything cued to live music, anything a performer interacts with, and anything driven by hand tracking, where the effect has to land where the hand actually is.
The workflow that solves it: AirPlay for the build, cable for the show. Walk out to the audience position with the iPad, rough in your surfaces from the viewpoint that matters, then plug in before doors. Going wireless for a whole event? Build a dedicated network with a travel router — our five-step AirPlay setup guide covers that properly.
Why an iPad Is Usually the Better Mapping Surface
Strip the job down and it is a precision pointing task: drag four corner dots onto four real corners, then double-tap a node and pull orange tangent handles until an edge curves to match a pillar. Precision scales with how much screen the preview gets.
The geometry is stark. A 6.1-inch iPhone display is about 14 square inches; an 11-inch iPad is about 57. Roughly four times the working area for the same frame, so the same one-pixel correction on the wall is four times larger under your fingertip. Add occlusion — on a phone your finger covers a meaningful slice of the preview, so you are dragging a handle you cannot see — and the iPad advantage stops being a matter of taste. It also stands up, which turns it into a control surface you can return to.
Where the iPhone genuinely wins: Auto-Calibrate and live tracking use the rear camera, so you have to physically aim the device at the projected marker, and that is awkward with a 12.9-inch iPad. Walking out to the audience position to check the illusion is easier with a phone, and a phone is the device you always have. If that is your only hardware, the smartphone projection mapping guide covers that route in full.
The Full Workflow, First Surface to Projected Output
Step 1 — Connect first, then launch
Adapter into the device, HDMI into the projector, power into the adapter. Then open the app. Watch the Project Box: the ring lights up when a display is detected, the status line gives connection type and resolution, and the display count moves from 1 to 2. If it stays red, tap it for a panel with the steps for your platform. Projector mounted on its side? Portrait Projection Mode rotates the output to 9:16 while your controls stay landscape.
Step 2 — Add your first surface
Start Mapping, then Add Surface. A rectangle with four corner dots drops into the frame. Pull each dot onto a real corner of the object — standing where the audience will stand, because the illusion is viewpoint-dependent and a map that is perfect from the projector's position can look wrong from the floor. Corner positions are stored, so the same map re-projects at any scale later.
Step 3 — Turn on Warp for anything curved
Straight edges are for flat panels. For a pillar, arch, curved wall or car bonnet, select the surface and tap WARP. Nothing changes visually — expected; it just records the current shape as a starting pose. Double-tap a corner node to reveal two orange tangent handles, then drag until the edge hugs the object. Corner dots reshape the whole surface; orange dots bend one edge. Curves save with the project and survive undo.
Step 4 — Apply media and cut your masks
Turn on Video Select Mode, tap the surface, apply a video or image. MP4 and PNG import from your library; the clip fills the surface and loops. For anything beyond a rectangle, the Custom Mask tool cuts the surface to the light and dark areas of an image, with a live Threshold slider and an Invert toggle — that is how you carve a projection cleanly around a window frame.
To run one continuous video across several separate props, tag the parent surface with Extended Mask Video first, then tag the others with Child Video Mask. Order matters; do the parent first or the slices will not line up.
Step 5 — Calibrate, but only if you want interactivity
Calibration teaches the app where your projection lands as seen through the camera, so tracked effects sit on the real image instead of drifting. Skip it if you are not using them. Tap Auto-Calibrate: the app projects a marker, switches to the rear camera, finds it and computes the alignment. Keep the whole marker in frame, dim the room, hold steady — it gives up after about 60 seconds. Redo it only if the projector, camera or surface moves.
Step 6 — Save the map so you never build it twice
Surfaces, media, masks, layout, warp and the Timeline are all one project file. Saving and loading those files is a Pro feature, and it is what changes how you work at a repeat venue: build once, reload next month, nudge for projector position, done. New to all of this? Start with the beginner's guide to digital mapping.
Where Other iOS Apps Do It Better
iOS has more mapping and mapping-adjacent apps than Android does, and some of them are the right answer for specific jobs. An honest rundown:
- Lazy Lighting (iOS only) is built around sketching and drawing with light directly onto a surface rather than warping video onto geometry. If your idea is generative light-painting, that is what it is designed for. Its geometry tools are lighter than a dedicated mapper's — the Lazy Lighting alternatives comparison goes through that trade-off in detail.
- Optoma Projection Mapper (iOS, Android, Kindle), formerly DynaMapper, works in rectangles with bezier-curvable sides rather than a point-level mesh. Straightforward, and enough for flat panels and gently curved surfaces.
- HeavyM Remote (iOS, Android) is a remote for HeavyM running on a laptop, not a mapper in its own right — the right companion if you already run HeavyM.
- TouchViZ (iOS only) is aimed at VJ-style live visuals.
- Procreate (iOS only) makes the artwork rather than mapping it — a good pairing with any mapping app.
- VLC plays your file back. Sometimes that is all you need.
For a side-by-side ranked on geometric precision and workflow speed, see the seven best projection mapping apps for iOS and Android, or the Android projection mapping guide if you work on both.
Free vs Pro on iPhone and iPad
The free version is not a demo. Full mapping, media, effects, tracking, visualizers and the Timeline are all there. Two limits apply: a watermark on the projected image and on exported video, and an entry gate before you start mapping. On Apple platforms that gate is subscription-based; the watch-an-ad unlock is Android-only. Saving and loading project files is reserved for Pro.
Pro removes the watermark and the gate and unlocks Save, Load and Export — including Map Export to PNG, the feature worth understanding if you finish content elsewhere. Export the map geometry, build artwork in After Effects to exactly that warped shape, bring the render back in. Pro is sold through the App Store as Monthly, Quarterly, Yearly and one-time Lifetime plans, and it is a single listing covering iPhone, iPad and macOS. More answers in the projection mapping FAQ, or browse the rest of the SurfaBeam blog.
Frequently Asked Questions
Can you do projection mapping on an iPhone?
Yes. Connect the iPhone to a projector's HDMI input using the right adapter for its port, open a mapping app such as SurfaBeam, and the projector becomes a second output screen while the touch controls stay on the phone. You add a surface, drag its four corners onto the real object, apply a video or image, and the projection lands on the surface.
What adapter do I need to connect an iPhone or iPad to a projector?
It depends on the port. iPhone 15 and every iPhone since use USB-C, so a USB-C to HDMI cable that supports DisplayPort Alt Mode works, or Apple's USB-C Digital AV Multiport Adapter if you also want power passthrough. iPhone 14 and earlier, including every iPhone SE, use Lightning, and the reliable option there is Apple's Lightning Digital AV Adapter, which tops out at 1080p. On iPad, the 10th generation base iPad, the 4th generation iPad Air, the 6th generation iPad mini and the 2018 iPad Pro onwards are all USB-C; the 9th generation iPad was the last Lightning model.
Is an iPad better than an iPhone for projection mapping?
For building the map, usually yes. An 11-inch iPad gives you roughly four times the working area of a 6.1-inch iPhone, so dragging corner handles and bending warp curves is far more precise, and your finger hides less of the preview. The iPhone wins for auto-calibration and live tracking, where you have to aim the rear camera at the projected image, and for walking out to the audience position to check the illusion.
Does projection mapping work over AirPlay, or do I need a cable?
Both work. AirPlay needs an Apple TV or a projector with AirPlay 2 built in, and SurfaBeam forces wireless links into extended mode so the app controls exactly what appears on the wall. The trade-off is latency of roughly 100 to 300 milliseconds even on a well-tuned 5GHz network, which is fine for static content and ambient loops but not for anything cued to live music or driven by hand tracking. Use AirPlay while you build the map and a cable for the show.
Is SurfaBeam free on iPhone and iPad?
Yes. The free version includes full mapping, media, effects, tracking, visualizers and the Timeline. A watermark appears on the projected image and on exported video, an entry gate appears before mapping, and saving or loading project files is reserved for Pro. On Apple platforms that gate is subscription-based; the rewarded-ad unlock is an Android-only option.
Does the same app work on a Mac?
Yes. SurfaBeam uses a single App Store listing that covers iPhone, iPad and macOS, so the app you download on an iPhone is the same app on an iPad and on a Mac. On a Mac the projector is treated as a second monitor rather than an adapter-connected display, and as on iOS you should connect it before opening the app.
Buy the right adapter, then map something tonight.
Check your port, get the matching HDMI adapter, connect the projector before you launch the app, and drag four corners onto a real object. That is the whole first project. Everything else — warp, masks, tracking, the Timeline — builds on it.