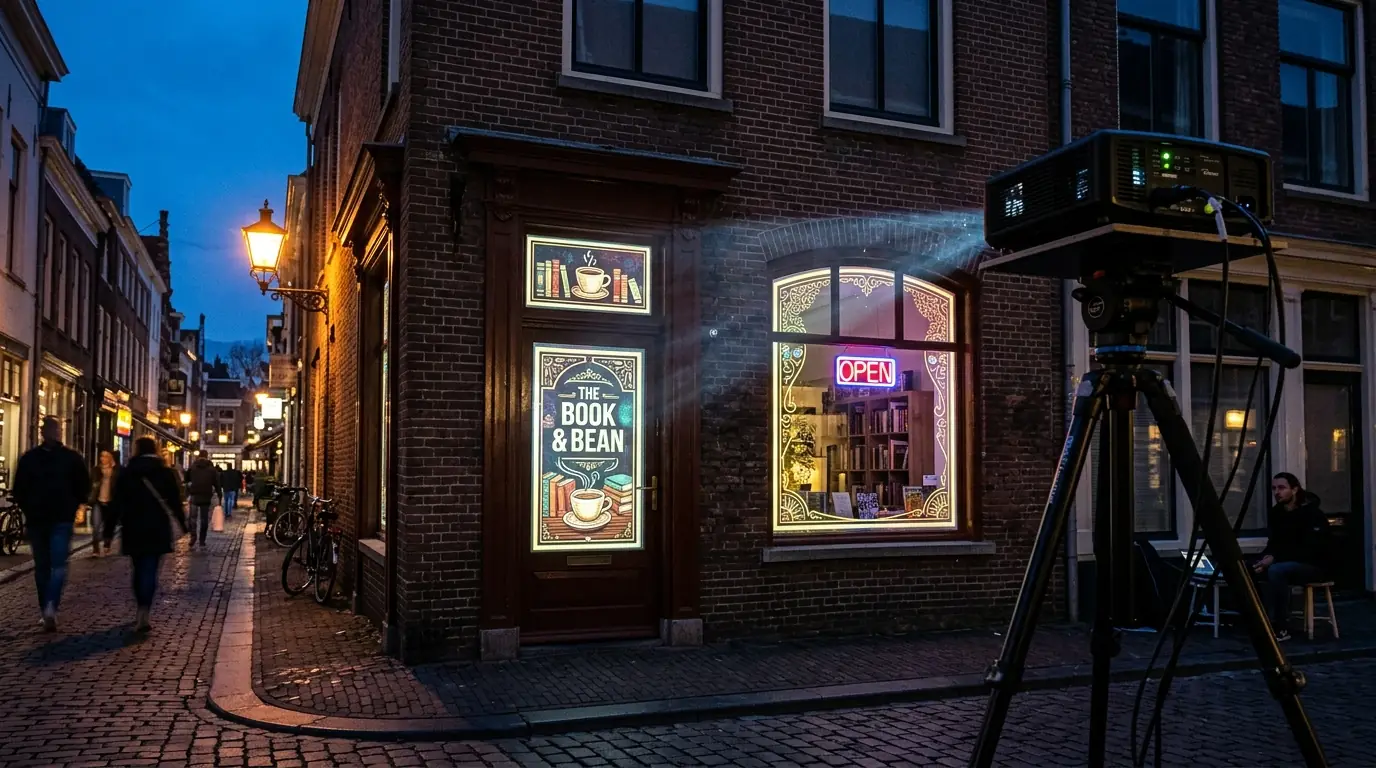
Start With the Scale Test, Not the Software
Every disappointing facade project fails at the same arithmetic. Brightness spreads over area, and area grows with the square of the image: double the width of your projection and each square metre of wall receives a quarter of the light. A projector that dazzles on a two-metre garage door is a grey smudge on a twelve-metre elevation, and no setting in any app recovers it. Measure the elevation first, then let the square metres you intend to light — plus how dark the site actually gets — decide whether this is a one-projector job at all.
| Target | Rough lit area | Realistic verdict |
|---|---|---|
| Shop window or shopfront panel | 5–12 m² | One projector, comfortably — even with street lighting nearby |
| Garage door or single bay | 5–8 m² | One projector; the easiest real building surface there is |
| One wall or gable of a house | 30–60 m² | One bright projector, in a genuinely dark garden or driveway |
| Whole terraced house front | 60–100 m² | Borderline. Expect to light selected elements, not the whole face |
| Civic building, church, office block | 200 m² and up | Several blended projectors, a media server and an operator. Rental territory |
The bands that matter are ANSI lumens, not the invented "LED lumens" figure on a marketplace listing. A prop in a dark room runs on hundreds; a house-scale elevation on an autumn evening wants thousands; a true facade sits in the ten-thousand-plus class that you rent for a weekend rather than buy. Our guide on choosing a projector for projection mapping goes through the specs in detail, and the canonical brightness table by room and surface lives in the projection mapping FAQ. If your target is the first row of that table, the whole job is costed end to end in our store window projection mapping guide.
Ambient Light Is the Real Constraint
Indoors you control the room. Outdoors you inherit it. A projector cannot draw black — black is the panel declining to add light — so anything already lighting your wall sets a floor under your image that no content, codec or app can dig beneath. Streetlights are the usual culprit, but so are shop signage, a neighbour's security floodlight, a lit car park behind you and headlights sweeping the elevation every ninety seconds.
One test beats every calculation: stand in front of the building at the hour and in the season you plan to run it. If you can comfortably read a phone screen held against the brickwork, you are fighting a lot of light. Photograph it from where the audience will stand — that photo predicts the result better than any spec sheet.
Then consider buying darkness instead of lumens, because it is usually cheaper. A shop that switches its fascia sign off for two hours, a security light moved onto a manual switch, a drape shielding the wall from a car park — any one can be worth more than two thousand ANSI lumens you would otherwise pay for, and killing a single misaimed 20 W floodlight often transforms a residential job. Season matters too: the display that looks weak in early September is startling in late October at the same clock time.
Throw Distance, and Where You Are Allowed to Stand
Distance equals image width multiplied by throw ratio. A common 1.5:1 lens covering an eight-metre elevation needs about twelve metres of clear ground; a 0.8:1 short throw does it from roughly six and a half. Measure the space you genuinely have before you shop: the street does not get wider, and no software setting moves the lens.
On a building, that measurement is also a permission question. Twelve metres back from a shopfront usually means a public pavement, a parking bay or someone else's land. Decide early where the projector lives, whether it can be locked to something immovable, and whether a van will park in front of it at seven in the evening. Anything in the beam casts a hard shadow, so a projector at head height on a busy pavement spends the night drawing silhouettes of pedestrians. Mounting high — a first-floor window opposite, a bracket, a scaffold tower — fixes that, and is often the biggest single quality upgrade available.
Mount steeply from below at your peril: a very low, sharply angled throw demands extreme geometric correction and rakes across the masonry, so every course of brick and every sill throws its own shadow up the wall. Whatever you use, switch the projector's own keystone and auto-correction fully off before mapping. Otherwise its geometry engine and the app's warp fight over the same image, and auto-keystone that re-fires after a knock silently invalidates an hour of work.
Survey the Surface Before You Build the Map
An hour with a tape measure and a camera saves an evening on a ladder. Facade work rewards surveying in a way indoor prop mapping does not, because the surface is fixed, public and full of things you cannot move.
- Photograph the elevation from the projector's exact position, at lens height and as square-on as the site allows. SurfaBeam has no template or map export, so this photograph is your design reference: drop it into your video editor as a bottom layer and build content against it. A photo taken two metres to the left will lie about every angle.
- Measure each element you intend to light separately — the door, each window bay, the panel between them, the gable. Those numbers give you the aspect ratio your content needs before you render a frame.
- List the obstructions, and the material changes. Downpipes, dishes, alarm boxes, signage, wall lamps; and where render meets brick, where a string course throws a shadow line, where a repair patch is a different colour. Each one either joins the composition or becomes a shape to keep light off, and those edges show through whether you plan for them or not. Trees are the hard case, because they move.
- Note the glass. Windows reflect and transmit rather than return light, so they read as dark holes. Mask them out deliberately or design around them — a run of unlit windows in a lit facade looks intentional; a smeared image half-landing on glass does not. Pale closed blinds turn a window into a usable panel.
- Check power, weather and the cable route. Outdoor runs need weather protection and an RCD, and a six-week seasonal display needs the projector sheltered and ventilated, not sealed in a box.
Map the wall from in front of the wall
Facade alignment is a walk-look-adjust loop, and doing it from a laptop twelve metres back is what makes it slow. SurfaBeam runs the same mapping, warping, masking and playback toolset on Android, iOS, macOS and Windows, so the controls can be in your hand at the building. Every build is on the download page, and the free version is permanently free.
Why Brick and Render Eat Your Contrast
Buildings are the worst screens most of us ever project onto, and they fail in three separate ways that people tend to blame on the projector.
1. Reflectivity: not all walls give the light back
A pale smooth render returns a large share of what you throw at it. Dark engineering brick, weathered stone or soot-blackened Victorian brickwork return a fraction of it — same projector, same distance, same content, and a gap in apparent brightness wide enough to look like a hardware fault. Budget for a dark elevation in lumens at the planning stage, and where part of the building is pale and part is dark, light the pale part and treat the dark part as background.
2. Texture: the surface has its own picture already
Rough render, raked mortar joints, pebbledash and stonework scatter light and cast their own micro-shadows, and the shallower your throw angle, the longer those shadows get. Fine detail dissolves into the wall's relief. The rule is blunt: the rougher the surface, the bigger and simpler your shapes need to be. Thick outlines, large flat fields of colour and hard-edged geometry read cleanly on brick; delicate gradients, small text and thin linework do not, and no amount of resolution rescues them.
3. Colour cast: the wall multiplies your image
Project white onto red brick and you get pink. Every colour you send is filtered by the wall's own, so cyans and cool blues on red brick land muddy and dim while warm tones stay lively. Grey concrete and pale render are far more neutral and give the widest palette. Design in the range the surface allows — warm content on brick, anything you like on render — and check it on the actual wall, because a monitor will not tell you. A ten-second test loop carrying a grey ramp, three text sizes and a few saturated colour blocks answers more than a week of guessing.
Building the Map: One Surface per Architectural Element
Once the projector is placed, locked, focused and throwing an honest rectangle, the mapping itself is quick — provided you stop thinking about "the facade" and start thinking about elements: a door, each window bay, the wall panel between them, the gable above. In SurfaBeam the loop is the same for each. Tap Add Surface and a rectangle with four corner dots appears; drag each dot onto the corresponding real corner of that element, then repeat. Anything outside a surface projects black, which keeps light off the neighbour's wall and out of the upstairs windows without any extra step. Where two bays meet, switch on Node snapping: a dragged corner then latches magnetically onto its neighbour's corner, so the two edges line up without a visible seam.
For elements that are not flat — a bowed render panel, an arched door head, a curved bay window — select the surface and turn on WARP. Each straight edge can then be bent into a Bezier curve: double-tap a corner to reveal its two orange tangent handles and drag them until the edge hugs the real arch. Nothing moves until you drag, which is expected. For a fussy silhouette such as railings or a grille, Pick Custom Mask cuts the surface using an image's light and dark areas, with a Threshold slider and an Invert toggle.
To run one continuous clip across several elements — a wave of colour sweeping the whole front rather than four unrelated videos — tag the large parent surface with Extended Mask Video first, then tag each of the others with Child Video Mask; each child shows its own slice of the single parent video. A transparent PNG Overlay rides on top of a playing clip when a logo has to sit over the content. Output resolution follows whatever the projector reports, so there is nothing to set by hand.
Two habits pay off on buildings. First, judge from the audience position rather than the device: walk across the road, look, come back — Capture still image saves a photo of the projection as a record. Second, save properly. With Pro, Save to Files writes a portable Scene_<date>.json that Load from Files reopens, including on another machine — useful when you build the map on a tablet at the wall and hand the show to a laptop. It stores links to your media rather than the media itself, so carry the video files across too and re-check the alignment: a map made from one projector position is not valid from another. Which machine runs the show is covered in desktop versus mobile projection mapping, and every panel and gesture is documented in the SurfaBeam user guide.
What One Projector and a Touch App Will Not Do
To keep this page as honest as the brightness advice: SurfaBeam drives one projector and one output. There is no multi-projector edge blending, no DMX or Art-Net fixture control, no Syphon, Spout or NDI input from other software, no projection from a 3D model through a virtual camera, and it is not a media server. The music visualizer loads its own audio file and generates one of twelve procedural modes; it does not make an imported video react to sound.
If the brief is a listed civic building, a crowd, a soundtrack and a launch date, that is a production: blended high-lumen projectors, a media server, a rigging plan and a crew who have done it before. Hire that. If it is one projector on one building front — what nearly everybody actually has — the tooling on this page is the right size. The wider landscape is in our comparison of the best projection mapping software for 2026.
Cheap Facade Projection: Where the Money Actually Goes
Software is the cheapest line on a facade project and the one people research hardest. In rough order of what your money decides: the projector, the mount and weather protection, the content, the cabling and power, then the app. Rent rather than buy for a single night — a weekend rental costs a fraction of buying, and hire firms usually include a lens choice, worth more than extra lumens when the throw distance is awkward. Used business projectors are the other honest saving: office stock is rated in real ANSI lumens, has real HDMI inputs and sells cheaply when companies refresh. Failing both, reduce the lit area rather than raising the budget.
On the app itself: SurfaBeam's free version is permanently free and includes the full mapping, masking, warp, media, effects, tracking, visualizer and Timeline toolset. Its limits are a watermark on both the projected and the exported image, and an entry gate before mapping. Pro removes both and unlocks Save, Load and Export — the point for anything running more than one evening. It is sold as a subscription or a one-time Lifetime purchase through the App Store and Google Play, and as a one-time DLC on Steam. What free tiers really give you is compared in our guide to free projection mapping software.
Related reading
- What projector do you need for projection mapping? — brightness, throw ratio, contrast and the specs that lie.
- Store window projection mapping — the smallest, most reliable commercial version of this job.
- Best projection mapping software 2026 — the categories, and which one your building belongs in.
- Free projection mapping software — what you actually get without paying.
Frequently Asked Questions
Can I projection map a whole building with one projector?
A small one, sometimes. A single wall or gable of a house in a dark garden is achievable with one bright projector. A whole terraced house front is borderline — you will get a better result lighting selected elements than washing the entire face dimly. Anything at civic scale needs several projectors blended by a media server, plus the throw distance and power to match. That is a production, not a purchase.
How many lumens do I need for a building facade?
It depends on lit area and ambient light, not ambition. In ANSI terms a house-scale elevation on a dark evening wants thousands rather than hundreds, and a genuine facade in a lit street sits in the ten-thousand-plus class that is normally rented. Ignore "LED lumens" figures — they routinely run about ten times the ANSI measurement. The brightness table is in our FAQ.
What software do people use for building projection mapping?
Large facade shows run on desktop suites and media servers that blend several projectors into one image and drive lighting fixtures on the same clock. Single-projector work on a shopfront, a garage door or one wall needs far less: corner pinning, edge warping, masking and reliable playback. SurfaBeam covers that second category on Android, iOS, macOS and Windows, with three installation routes on Windows — the direct installer, the Microsoft Store and Steam. Choose by category, not by feature-list length.
Can I run a building projection from a phone or tablet?
Yes, provided the device can output video — USB-C on Android requires DisplayPort alt-mode, which many midrange phones lack — and provided it has power and somewhere sheltered to sit for the evening. The stronger case for a handheld is the mapping itself: aligning a facade means walking to the wall and back repeatedly, and holding the controls while you look at the building removes most of that. Cable rather than cast while you align; a wireless link adds enough latency to make dragging a corner feel like steering a barge. The device side is covered in our smartphone projection mapping guide.
Survey the wall this week, map it next
Photograph the elevation from where the projector will stand, stand there again at showtime to see what the streetlights are doing, then build the map on the device you will run it from. SurfaBeam does the corner pinning, Bezier edge warping, masking and playback on Android, iOS, macOS and Windows, permanently free to start, with Pro unlocking Save, Load and Export when the alignment is worth keeping.