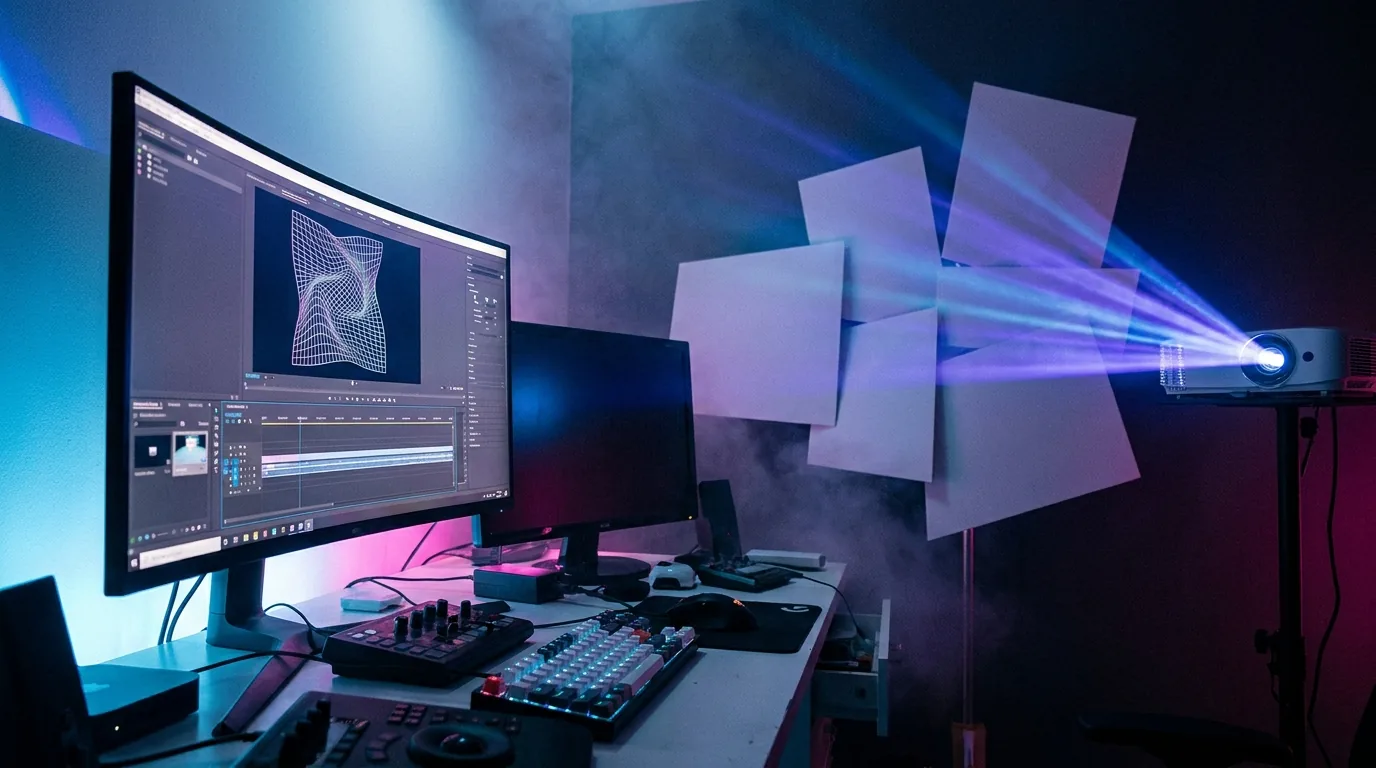
Why Map From a PC at All?
Phones are excellent on site: you stand at the wall, drag a vertex with your finger, and watch the projected image move under your hand. But three jobs are better done on a desktop, and they are why the Windows build exists.
First, precision at scale — a mesh with dozens of control points is easier to nudge with a mouse than with a fingertip that covers four of them at once. Second, content work: trimming clips, sequencing them on the Timeline, and exporting the map as a PNG template so artwork lines up with the real geometry. Third, unattended running — a PC racked under a stage plays for six hours without a battery dying.
This article assumes you already know what a mask is for. If not, start with the beginner's guide to digital mapping — corner pinning and warping work the same way on every platform.
Realistic System Requirements for Windows 10 and 11
SurfaBeam ships a desktop build for Windows 10 and Windows 11. On an old, unpatched Windows 10 install, check the minimum OS build shown on the Microsoft Store or Steam listing first: the Microsoft Store blocks an install below its stated minimum, while the direct installer does not check.
Beyond the OS version, four things actually decide whether a machine copes:
- Graphics: integrated graphics on a recent laptop will drive one 1080p projector with a warped, masked layer or two. A discrete GPU starts to matter at 4K source content, several stacked layers, or two projector outputs from one machine.
- Video outputs: count the ports before you count the teraflops. A laptop with one HDMI socket is a one-projector machine. This limit bites far earlier than GPU performance does.
- Storage: keep video files on the internal drive, not a USB stick. A cheap flash drive stuttering mid-loop is a common and easily avoided cause of playback hitches.
- Power: mains, always. Default Windows and laptop-vendor power settings throttle the GPU on battery, and the resulting frame drops look like a software fault but are not.
One caveat: 3D projection mapping onto sculpted geometry pushes more mesh detail and more layers than a flat facade. If your target is an object rather than a wall, budget headroom and test at full resolution before the day.
Three Ways to Install SurfaBeam on Windows — and When to Choose Each
Windows is the only platform where SurfaBeam has three distribution channels. They deliver the same application; what differs is how it updates and how you pay for Pro.
1. The direct .exe installer
A standard Windows installer from the SurfaBeam site. Choose it for show machines and permanent installs, where the version you tested in the workshop should be the version that runs on the night — nothing updates it behind your back. It is also the route that still works on locked-down machines in schools, museums and corporate venues, where the Microsoft Store is disabled by policy and installing Steam is not an option either. The trade-off: you check for new versions yourself.
2. The Microsoft Store
The low-friction option for a personal machine. Windows handles installation, updates and removal, there is no extra launcher sitting in memory, and uninstalling leaves less behind than a traditional installer does. It is the sensible default for a laptop you are learning on and taking the occasional job with.
The one thing to know before an event: Store apps update themselves in the background. If a machine is going into a run, open the Store, go to Library → Settings and turn off automatic app updates for the duration — the same discipline you apply to Windows Update. An app that silently updates the afternoon of a show is a version you have not tested.
3. Steam — free base app, Pro as a one-time DLC
This channel changes the commercial model, not just the delivery mechanism. On Steam the base SurfaBeam - Projection Mapping app is free, and Pro is sold as a separate one-time DLC purchase — SurfaBeam - Pro Projection Mapping — rather than a recurring subscription.
That matters if you map twice a year. Subscription pricing suits people who use a tool weekly; it is poor value for someone doing one Halloween house projection and one wedding. The trade-off is that Steam has to be installed and signed in for the app to launch, which some people would rather avoid on a dedicated show machine — in which case the .exe is the better fit.
Install SurfaBeam
Three routes on Windows, plus the mobile and macOS builds. The free version includes the full mapping, media, effects, tracking, visualizer and Timeline toolset.
Extend, Don't Duplicate: the Setting That Makes or Breaks the Map
This is where most first-time desktop mapping goes wrong, and it has nothing to do with the app. Duplicate mirrors your desktop onto the projector: your taskbar, cursor and app windows all end up on the wall, and the projector is forced to share your monitor's resolution. Extend treats the projector as a second, separate display, so the projection output sits on it full-screen and clean while the controls stay on your monitor. Always extend.
Setting the projector as a second screen
- Connect the projector by HDMI or DisplayPort and switch it to the matching input before you touch Windows. Windows will not detect a display the projector is not showing.
- Press Windows + P and choose Extend.
- Open Settings → System → Display and click Identify. Windows flashes a number on each screen so you know which rectangle is the projector.
- Drag the projector's rectangle so its position roughly matches reality — to the left of your monitor if the projector is to your left. This only affects where your mouse crosses over, but getting it wrong is a constant low-level annoyance during a long setup.
- Confirm your laptop or desktop monitor is still ticked as Make this my main display. If the projector becomes the main display, your taskbar and dialogs migrate onto the wall.
Resolution, refresh rate and scaling
Select the projector in Display settings and set its native resolution — the one Windows marks as Recommended, which for most current projectors is 1920 × 1080. A non-native resolution makes the projector rescale internally, and rescaling softens exactly the hard mask edges you spent twenty minutes drawing.
Set Scale to 100% on the projector display; Windows often inherits 125% or 150% from a laptop panel, and mixed scaling is a reliable source of "why is my output slightly cropped" confusion. Under Advanced display, confirm 60 Hz rather than 30 Hz — some HDMI adapters negotiate 30 Hz at 4K, and 30 Hz motion looks visibly juddery on a large surface. Finally, if colours look washed out and grey, turn HDR off for that display; most affordable projectors handle SDR content better than they tone-map HDR.
Stopping Windows from interrupting the show
Two minutes of housekeeping keeps Windows off the wall. Turn on Do not disturb (called Focus assist on Windows 10) so notification toasts do not land on the projected surface. In Power & battery, set screen and sleep timeouts to Never while plugged in. Disable any screensaver, and in Windows Update use Pause updates for the length of the install.
One failure mode is worth knowing in advance: if the projector drops out — someone knocks the HDMI, or the projector sleeps — Windows removes that display and pulls every window back onto the remaining monitor, which ends your full-screen output. Reconnecting the cable does not always restore the window to the projector, so budget a few seconds to drag the output back and re-enter full screen. On a long unattended run, tape the connector at both ends and turn off the projector's own auto-power-off timer.
Multi-Projector Setups: What Changes
A second projector is a different kind of work, and it matters which version of "multi-projector" you need.
Separate surfaces is the straightforward case: one projector on the DJ booth, another on the back wall, no overlap. Extend to two displays from one PC and put an output on each, or — often simpler and safer — run one machine per projector. Separate machines mean a failure on one surface does not take the show down, and they sidestep the port-count problem.
Overlapping beams on one continuous surface is the harder case. Two projectors covering a single wide facade need soft-edge blending, where the overlap is feathered so the seam disappears. SurfaBeam's multi-surface mapping is built around discrete surfaces rather than blended arrays, so for a wide architectural wash with blend zones, a dedicated show-control suite such as Resolume Arena, MadMapper or HeavyM is the right tool — and I would say so to a client.
A note on splitters, because it comes up: an HDMI splitter sends the same picture to both projectors. That is useful for stacking two beams on one surface to double brightness, and useless for covering two different surfaces — for that you need two real outputs, which means two ports on the machine or two machines.
Either way: label your cables. With two HDMI runs into the back of a PC and a projector showing "No Signal", the fastest diagnostic is knowing which cable is which.
Desktop or Mobile? Map in the Studio, Adjust on Site
The most common question about the Windows build is whether it replaces the phone. It does not — they cover different halves of the job.
The PC is the studio tool: mouse precision on mesh vertices, a big screen for the Timeline, and Map Export to PNG so artwork built in After Effects lines up with the real geometry. Pro unlocks Save and Load, so a project built on Tuesday reopens intact on Saturday.
The phone is the site tool. When the venue turns out to be 30 cm off the plan and four corners need nudging while you stand at the wall, a touchscreen in your hand beats walking back to a laptop every time. It is also the proportionate choice for jobs that do not justify a PC — a Halloween window, a small pop-up, a rehearsal. Our smartphone projection mapping guide covers that side, and the Android walkthrough covers USB-C HDMI output specifically. Build and rehearse on the PC; keep the mobile build installed for the fixes that do not warrant a laptop bag.
Choosing Projection Mapping Software for Windows: an Honest Comparison
Several of the apps people search for alongside "projection mapping software for Windows" have no Windows build at all, so start by ruling those out.
Lazy Lighting on Windows does not exist — it is an iOS app, and our own app comparison lists it as iOS-only with limited warping (we cover the substitutes in the Lazy Lighting alternatives piece). TouchViZ and Procreate are iOS-only too. Optoma Projection Mapper runs on iOS, Android and Kindle, and the same comparison lists it without mesh warping. HeavyM Remote is the odd one out: it is a phone controller for HeavyM's desktop application, so the app itself has no PC version — but HeavyM's desktop software does run on Windows, and belongs in the list below.
That leaves two realistic categories of video projection mapping software on Windows. The professional show-control suites — Resolume Arena, MadMapper, HeavyM, plus node-based environments like TouchDesigner — are deeper tools with edge blending, wide protocol support and long track records. For a festival stage or a permanent architectural piece with blended arrays, that is where you should be. (Millumin comes up in these searches as well; it is macOS-only, so it is not an option on a PC.)
SurfaBeam sits in the other category: mesh warping, corner pinning, digital masking and multi-surface mapping, plus MP4 and PNG import, touch- and sound-reactive effects, hand, body and object tracking, visualizers and a Timeline editor — aimed at people who map occasionally rather than daily. The toolset is the same on Windows as on the phone. For a wall, a facade, a set piece or a shop window, that covers the job. For a six-projector blended dome, it does not, and does not pretend to. If you are still weighing categories rather than products, the projection mapping software overview breaks the market into four groups.
Free vs Pro on Windows
The free version is not a demo with the interesting parts removed. It includes the full mapping, media, effects, tracking, visualizer and Timeline toolset, so you can map a whole surface and judge the geometry engine before spending anything. The limits: a watermark on the projected image and on exported video, an entry gate before mapping, and no saving or loading of project files. The free projection mapping software roundup puts those limits next to the open-source options.
That last point is what decides it for most desktop users. A map you cannot save is a map you rebuild from scratch every time you reopen the app — fine for a one-evening experiment, unworkable for anything you will run twice. Pro removes the watermark and the entry gate and unlocks Save, Load and Export, including Map Export to PNG for After Effects.
How you pay depends on where you install from: Monthly, Quarterly, Yearly and one-time Lifetime plans through the App Store and Google Play, or the one-time DLC on Steam. Plans and refunds are covered in the FAQ, the visual user guide walks through every panel screen by screen, and new articles land on the blog as the Windows build develops.
Frequently Asked Questions
Does SurfaBeam run on Windows 10, or do I need Windows 11?
SurfaBeam ships a desktop build for Windows 10 and Windows 11, and all three distribution channels serve the same application. The Microsoft Store and Steam listings state the minimum OS build, so check them before installing on an older Windows 10 machine: the Microsoft Store blocks an install below its stated minimum, whereas the direct .exe installer does not check.
Should I install SurfaBeam from the .exe, the Microsoft Store or Steam?
Use the direct .exe installer for a show machine, where you want a fixed version and control over updates. Use the Microsoft Store on a personal PC, where Windows manages the install. Use Steam if you would rather pay once than subscribe: the base app there is free and Pro is a one-time DLC purchase.
Is Lazy Lighting available for Windows?
No. Lazy Lighting is an iOS app, and our own app comparison lists it as iOS-only with limited warping, so there is nothing to install on a PC. To map from a desktop machine you need a tool with a native Windows build — SurfaBeam is one, and Resolume Arena, MadMapper, HeavyM and TouchDesigner are the heavyweight alternatives.
How do I set my projector as a second screen in Windows?
Connect the projector by HDMI or DisplayPort, then press Windows + P and choose Extend rather than Duplicate. Open Settings, then System, then Display, click Identify to confirm which panel is which, and drag the projector rectangle to match where it physically sits. Set the projector to its native resolution, keep your monitor as the main display, and set scaling on the projector display to 100%.
Is the Steam version of SurfaBeam Pro a subscription?
No. On Steam the base app is free and Pro is a one-time DLC purchase rather than a subscription. Through the App Store and Google Play, Pro is sold as Monthly, Quarterly, Yearly and one-time Lifetime plans. Either way, Pro removes the watermark and the entry gate and unlocks Save, Load and Export.
Do I need a dedicated graphics card for projection mapping on a PC?
Not for a single projector at 1080p — integrated graphics on a recent laptop will drive one output with a warped, masked layer or two. A discrete GPU earns its place at 4K source content, several stacked layers, or two projector outputs from one machine. Check the machine's video ports too; that limit bites long before the GPU does.
Set up your first map on Windows tonight
Extend your display, point the projector at a wall, and see how close the geometry gets before you decide anything. The free version maps, masks and plays back in full — and on Steam, Pro is a one-time purchase rather than a subscription.