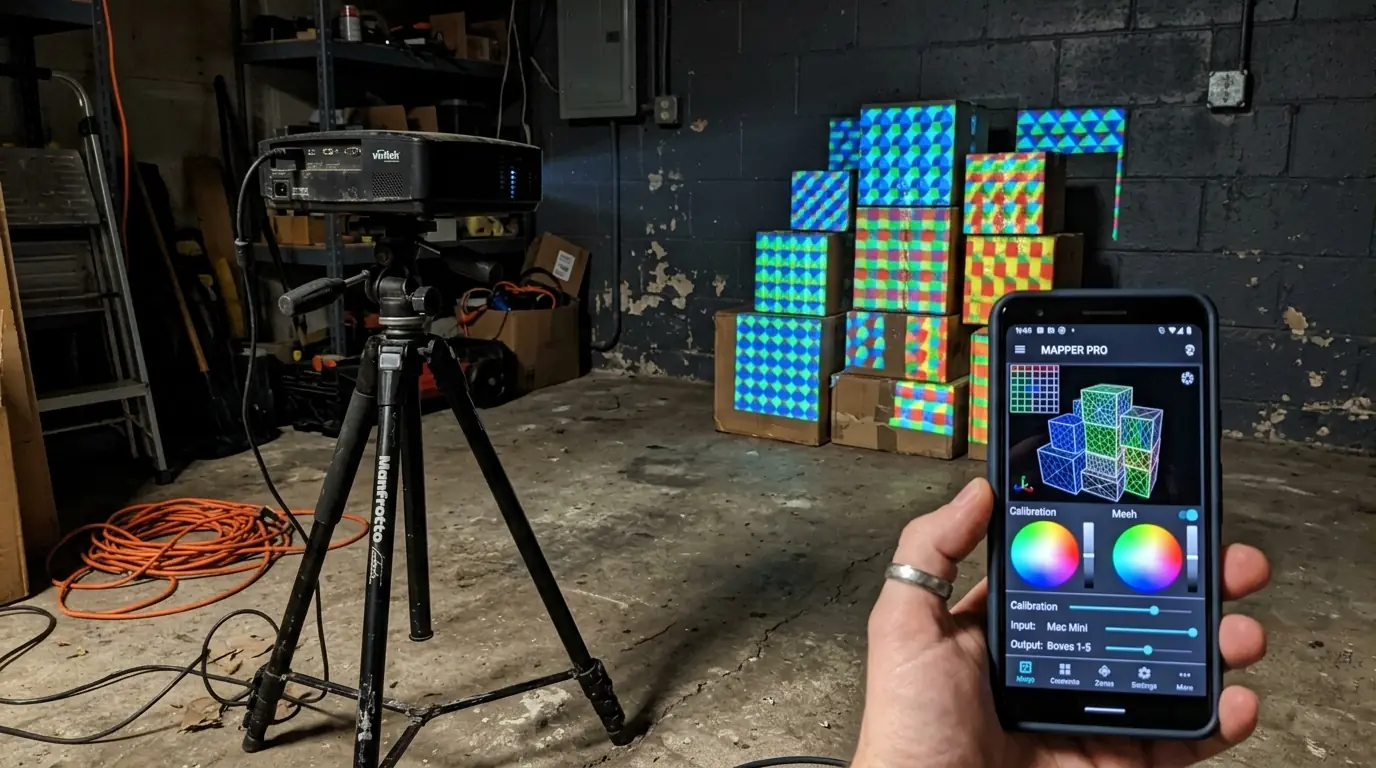
A Projection Rig Is Four Line Items
Whether it is a pumpkin on a porch or a shop front, every setup is the same four things: a device that plays and warps the picture, a projector that throws it, something that holds the projector perfectly still, and content to put on the object. Software lives inside the first item and is normally the smallest number on the list. The projector is the largest, and the mount — the one nobody budgets for — decides whether the other three were worth the money.
So the order that works when funds are short: use the device you own, borrow the projector before buying one, spend attention rather than cash on the mount, treat content as a scavenging problem. If the vocabulary is new, the beginner's guide to digital mapping covers the concepts this piece assumes.
You Almost Certainly Do Not Need a Laptop
This is the biggest cost people invent for themselves. A phone or tablet from the last few years runs the whole job — dragging surface corners onto a real object, bending an edge around a curve, masking, playing video, building a timeline. On a small rig it is arguably the better machine, because the controls stay in your hand at the object instead of on a desk eight steps away, and that walk-back-and-squint loop is most of what makes a first map take three hours. SurfaBeam runs the same toolset on Android, iOS and iPadOS, macOS and Windows; the trade-offs are weighed in our piece on desktop versus mobile projection mapping.
You can also learn the whole workflow before borrowing anything to project with. Everything previews on the device screen, so a first evening of practice — add a surface, drag its four corners, apply a video, bend an edge — costs nothing, and a built-in test mode can fake a "Connected (Test Mode)" state so you can see the connected interface while you learn it. Do that first and the projector you eventually borrow becomes a rehearsal rather than an experiment.
The one thing to check: can your device send a picture out?
On Android that means the USB-C port supports DisplayPort alt-mode, which a fair number of midrange handsets quietly omit; plug the phone into any USB-C monitor or TV and you will know in ten seconds. USB-C iPhones and iPads output through a plain USB-C to HDMI cable, older Lightning iPhones need Apple's own Digital AV Adapter, and on a laptop it is just HDMI. That cable is often the only thing on this page you have to buy — the device-side specifics are in the Android guide and the iPhone and iPad guide.
AirPlay, Chromecast and Miracast cost nothing extra and are detected automatically, but you feel the latency the moment you drag a corner — usable for playback, tiring for alignment. Order matters too: on macOS, Windows and iOS, plug in before opening the app; Android hot-plugs at any point. Output resolution follows the projector by itself.
Where an older device does hold you back
Mapping, warping, masking and playback are not the demanding parts; the camera-driven features are. On a typical Android phone the heavy tracking modes start greyed out, and your first tap runs a one-time twenty-second benchmark instead of starting the effect — anything under roughly fifteen frames per second stays blocked as incompatible. Object detection is never locked, and desktops and high-RAM phones skip the test. On an old handset, expect a solid mapper and a partial effects tool.
The Projector: Borrow, Then Hire, Then Buy Used
The projector is the expensive item and the one you can most easily avoid paying for on a first attempt. Work the borrow list before opening a shopping tab: school and university AV departments, libraries, makerspaces, community centres, the meeting-room cupboard at work, the friend who bought one for a tournament and used it twice. An evening's hire costs a small fraction of a purchase.
When you do buy, second-hand business projectors are the value play: offices refresh in bulk, so the used market is full of units with honest specifications and real HDMI inputs. Prices move constantly and vary by region, so judge a listing on these rather than on a number:
- Brightness quoted in ANSI lumens. A big unlabelled number in a listing is a marketing number, and the gap to a measured ANSI figure can be several times over. If the seller cannot say which it is, assume the worse one.
- Throw ratio against the room you have. Measure the distance the projector can sit at and the width you need to cover; throw ratio multiplied by image width gives the distance required. A standard-throw unit in a small garage will not fill the wall whatever you paid.
- Contrast, not resolution. On a mapped object the black areas sell the effect — it looks lit from within rather than like a rectangle of light. A 1280×800 projector with decent blacks beats a sharper one that renders black as dark grey.
- Lamp hours and the cost of a replacement lamp. A cheap projector with an expensive, discontinued lamp is not cheap; ask for the hours reading from the menu. LED and laser units hold brightness far longer.
- Fan noise indoors, and keystone only as a fallback. Keystone throws away pixels to fake a square image. Place the projector as square to the surface as the room allows and let the software do the rest.
The cheapest brightness upgrade is free: control the room. A modest projector outdoors after dark, or indoors with the blinds shut, beats a bright one fighting a streetlamp. There is more on matching a unit to a surface in our guide to choosing a projector for projection mapping.
The Mount Is the Cheapest Thing You Will Underestimate
A map is calibrated to one projector position. Move the projector two centimetres and every corner you carefully placed is wrong. This is the single most common reason a budget setup that looked perfect on Friday looks broken on Saturday, and it has nothing to do with software.
What you need is rigidity, not expense. Most projectors have a standard 1/4-20 tripod thread underneath, so a camera tripod you already own is a mount; so is a shelf, a milk crate or a plank across two chairs, as long as nothing on it can shift and nobody can kick it. Weigh the legs down, tape the power and HDMI cables to the floor so a foot cannot drag the rig, and mark the feet position with tape. That last one takes ten seconds and means a knock costs you a nudge rather than a remap.
Do the same for the object: if you are mapping onto boxes or props, mark where they stand. Node snapping helps you build clean shared edges between adjacent surfaces — a dragged corner snaps magnetically onto a neighbour's corner — but no software feature rescues a projector that has moved.
Practise before you borrow a projector
Everything previews on your own screen, so you can learn surfaces, warping and masking with no hardware at all. Install it on the device you already have and spend an evening on the loop before anyone lends you anything.
Content Is a Time Cost, Not a Money Cost
Beginners assume they need a library of animation. At wall scale the opposite holds: simple, high-contrast content reads better than busy footage, which turns to mush on a textured surface at four metres. A block of moving colour that fills a shape exactly beats a detailed clip spilling over its edges.
Free sources, in rough order of how well they work. Shoot your own on the phone — smoke, water, fire, torchlight on a wall all look expensive once cropped into a mapped shape. Use the app's own generators: the music visualizer loads an audio file of your own and produces one of twelve procedural modes from it, which is an evening of content for nothing. There is also a shelf of built-in video loops you can apply with one tap. Free stock sites come last, and are worth reading the licence on.
Two habits that save reshoots. Export everything as standard H.264 MP4 — a clip that plays back as a black shape is nearly always an unsupported codec rather than a broken map. And treat masking as content: "Pick Custom Mask" cuts a surface to the light and dark areas of any still image, with a threshold slider and an invert toggle, so a black-and-white PNG drawn in five minutes becomes a stencil. Anything outside your surfaces projects black anyway, which keeps light off the window frame for free.
Software, and the Honest Cost of a Clean Result
Here is the part budget articles usually fudge. SurfaBeam's free version is permanently free, not a countdown trial, and not a crippled demo: full mapping, media, effects, tracking, visualizers and the Timeline are all usable. What it does do is put a small watermark on both the projected image and any exported video, and show an entry gate before mapping — on Android that gate clears with a rewarded ad, one for a ten-minute unlock or four for the session, while on macOS Apple does not permit watch-an-ad-for-time so the panel there is subscription-focused. Saving, loading and exporting project files are Pro.
So be clear which side of that line your project sits on. For learning, practice, or a party in your own garden where nobody is inspecting the corner of the image, free is genuinely enough. For anything you will be judged on — a client job, a shop window, a video you want to post — the watermark is the real cost of staying free, and the only way past it is the paid unlock. The second pressure point is Save: without it, every session starts from an empty scene.
Some things stay free that people assume are not. Building and playing a Timeline costs nothing; only exporting it is Pro. Capturing a still photo of the projection is not Pro-gated either. On the paid side the shape is a subscription — monthly, quarterly or yearly — or a one-time Lifetime purchase on the App Store and Google Play, while on Steam Pro is a one-time DLC. Check the current figure on your platform's store page or the download page; Lifetime or the DLC is usually better value if you keep doing this past one Halloween.
If your software budget is zero and must stay that way, free and open-source desktop mappers charge you in setup time and self-support instead of money; we compare them against commercial free tiers in free projection mapping software, and the wider field sits in our comparison of the best projection mapping apps for 2026.
What to Skip Entirely at the Start
- A second projector. Blending two into one continuous image is a different discipline with its own software category. One projector, one object, until that is boring.
- A 4K projector. On a mapped object at normal viewing distance, brightness and black level are visible and the extra pixels are not.
- A dedicated machine, screen paint, and paid content packs. The device you own is the machine; cheap white primer or a bedsheet pulled tight is the surface; buy content when you know what you need, which is after your third map.
- A workflow that spans two devices. There is no cloud sync — nothing appears on your other machine by itself. Pro's Save to Files writes a portable
Scene_<date>.jsonthat Load from Files reopens elsewhere, but media are stored as links, so the video files must travel with it and the alignment needs rechecking against the new projector position. On a budget, build the map on whichever device will run the show.
Three Realistic Starting Points
| Build | What it is | What you spend | What you get |
|---|---|---|---|
| Nothing | Your phone or laptop, no projector, free tier | Zero | The whole workflow learned on screen. Nothing saved between sessions. |
| Borrowed | Your device, a borrowed or hired projector, a tripod you own, free tier | A cable or adapter, possibly an evening's hire | A real projection on a real object, with a watermark on the wall. |
| First spend | Used business projector, a rigid mount, the paid unlock | Projector is the big number; software is the small one | Clean output, saved projects, exportable video. |
If only one purchase is possible, make it the projector — it is the ceiling on everything else, and no software fixes a picture that is too dim for the room. The unlock is the smaller line and can wait until you know you will keep doing this. Every panel and gesture referenced above is documented button by button in the SurfaBeam user guide.
Where a Budget Rig Genuinely Stops
Being honest about the ceiling saves people money. A cheap rig will not light a building facade — that needs several high-output projectors blended into one image and run from a media server with an operator, a different budget by an order of magnitude. It will not work in daylight, whatever the box says. It will struggle with an all-day unattended install, where lamp hours and heat become the real problems. And if your content is generated live in another application rather than played from a file, you are in desktop-suite territory regardless of price.
Everything below that line — a porch, a car, a band backdrop, a shop window after dark, a wall at a party — is reachable with a borrowed projector, a tripod, the phone you own and an evening of patience. Start there and let the kit follow the work.
Related reading
- Free projection mapping software — what you really get without paying, free tiers and open source compared.
- Choosing a projector for projection mapping — lumens, throw ratio and contrast in plain terms.
- Best projection mapping software 2026 — the categories and how to pick one.
- Projection mapping with a smartphone — the whole job from a device in your pocket.
Spend an evening before you spend anything else
Install SurfaBeam on the phone, tablet or computer you already own and learn the loop on your own screen — add a surface, drag its corners, apply a video, bend an edge around a curve. The free version is permanently free and includes the full toolset; it watermarks the projected and exported image, and Save, Load and Export are Pro.